The Domestic Barbie
Tutorials, Ideas and Thoughts from a Crafty Mom
Mei Tai Ring-Conversion Tutorial
I LOVE using a carrier to tow around my happy little 9 month old. We own an ergo organic carrier and LOVE it! However, I wanted to try a Mei Tai style carrier, so I made one. I'm very happy with the outcome so I am writing the tutorial to encourage you to make your own. Its alot easier that I originally thought. The most important steps are to STARCH, IRON and PIN!!! I can not stress enough of how important those 3 steps are. They really make a difference between 'homemade' and professionally looking.
Supplies:
-
3/4 yard of a Home Decor 'canvas' material (This will be your 'main' panel of fabric! I bought mine at Joann's, 30% off of $9.99)
-
2 yards of a coordinating broadcloth fabric; We will call this Fabric B (This fabric will be the straps)
-
3/4 yard of coordinating broadcloth fabric; We will call this Fabric C (This is for the inside panel of the carrier; closest to the baby)
-
1 yard of 6oz polyester batting (padding for straps and waist belt)
-
Sling Rings (from Slingrings.com OR I got mine at a local resale shop by purchasing 2 ring-style belts and cut off the rings, DO NOT PURCHASE D-style rings! They need to be 1 solid piece of metal with no visible gap or meeting point.)
-
Coordinating Thread
-
Scissors
-
Iron
-
Starch Spray
-
Yardstick or Measuring Tape
-
Tailors Chalk
-
Pins
-
Sewing Machine
-
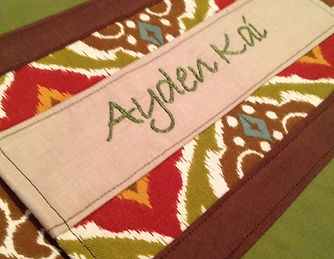
Optional- Embroidery Machine or Iron-on Applique if you want to personalize your carrier
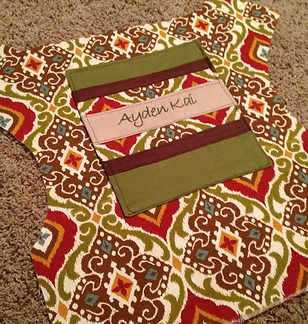
First Step.... Draw the pattern for the body panel.
*I used a few pieces of lined notebook paper taped together*
Step 2- Fold fabric (right sides together) and pin pattern in place.
Step 3- Cut around pattern. Repeat with the same fabric and the coordinating fabric (Fabric C). This second piece will be sandwiched between the 2 panels to reinforce the strength of the carrier.
**** If you want to embroider or add any appliques to outer fabric of your carrier this is the time to do so!!***
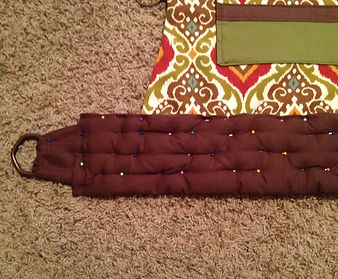
Step 4- With Fabric B, measure 25" long by 10" wide. This will be your waist belt. Starch and Iron lengthwise and set aside.
Step 5- Using the same fabric, Measure the pieces for the straps (2), 84" long by 10" wide. (It is always nicer to have long straps that you can shorten later.) Fold in half lengthwise, starch and iron. Set aside.
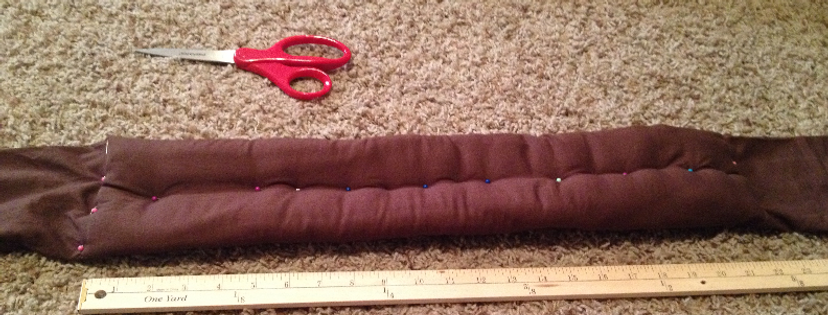
Step 6- PADDING! This step is optional. I prefer padding in the straps so I used 3 layers of the 6oz polyester batting. 5" of your strap will be sewn inside the carrier for added strength so follow the pictures for a visual of what to do on this step.
Step 7- Time to SEW! Start with your straps. Make sure the wrong sides are facing each other and sew a straight stitch along the pinned edge, leaving one end open to flip it rightside out. Don't forget to backstitch to hold your stitches! Once your finished sewing, flip the strap rightside out and iron once again. Repeat for other strap.
From the unsewn end, measure 5" up and mark a straight line widthwise. From that line, measure 22" down and mark a line. Between the 5" line and the 22" is where you padding will need to be placed. I flipped my strap inside out just until the 22" mark and inserted my padding and pinned on top holding the end in place. I carefully pulled the fabric to 'cover' the remaining padding until it was completely encased in the fabric. Once it was inside the strap, I pinned it in place and sewed straight lines to keep it in place. I once again, ironed my straps just to make sure they had clean edges. Repeat for other strap.
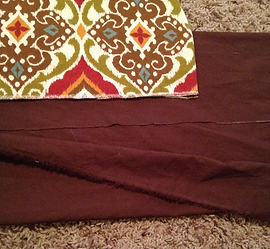
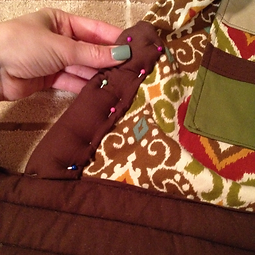
Step 8- Stack the fabric panels for the carrier on top of each other. Your main fabric (rightside up), your 2nd piece of main fabric(eitherway, its just for reinforcement and will not be seen), your straps (according to the picture), the side panel rings and your fabric C. In that order! PIN, PIN, PIN! I can not stress enough, PIN your fabrics together and make sure your straps are not tucked under any seams.
**The sling rings are going to be placed at the 8" mark on the pattern. I simply cut a rectangle and folded the raw edges in and folded again, looping the fabric thru and pinning to the main panel. Very simple.**
Starting at the bottom right, sew up the right side, across the top and down the left, leaving the bottom open. Flip inside out and iron. The bottom will look unfinished, this is normal, don't freak out.
Top stitch around the panels 1/8th of an inch. This will keep your panels from sliding and will add to the professional look. Do not skip this step.
Step 9- Draw a X-box on the carrier where the straps are. (See Picture) Sew over your x-box and backstitch to reinforce the stitch strength.
**This is not my pic found via google! ----->
(The link wouldn't load, sorry if this is your
pic, let me know so I can give you credit)
Step 10- Attach waist belt to the carrier by folding the padding inside the waist belt using a 1" fold over to encase the padding. (See Picture) PIN PIN PIN. On one end, add the waist belt rings with a small piece of fabric (I free cut and folded this piece) and pin in place. On the other end, I cut a waist strap from fabric B, folded in half, ironed and tucked inside the waistbelt (This belt will vary on length depending on your side, it needs to be long enough to loop through the rings and have several inches to hang).
I then, sewed the waistbelt to the carrier, backsstitching at each end. Next, I sewed a straight stitch, attaching the waist rings and then sewed lines down the waist belt to keep the padding in place. Once I reached the other end of the waist belt, I sewed the end closed encasing the waist strap in that seam. (See pictures)
I also chose to later add leg padding.... I simply cut a rectangle folded the raw edges in, stuffed with the polyester batting and sewed it on.
And TA-DA! You're all done! Grab your little squishy and try out your new mei tai! PLEASE test over a couch and it is wise to have a helper!!!! I recommend using your mei tai around the house before attempting to use it in public, until you are confident in your seams to support your babies weight. His/Her knees should be higher than his/her bottom.
**Disclaimer***Please feel free to use my tutorial to create your own PERSONAL mei tai. This tutorial is not created as an instructional to produce and/or sell mei tai's for profit! Use at your own risk!
Feel free to email me your mei tai, I would love to feature your mei tai on my website!